
Commodore’s Garage #3 – Centers of Mass
August 12th, 2016 by Matt Holden
I hope by now you’ve got a good idea of what you’re looking for in the car and how you compare to other simracers in terms of driving styles. If you’re still searching for what you need that’s no big deal, it can take some time to find. We’ve still got a couple of weeks before diving deep into the setup process, so no need to worry. I’ve set up a new way to keep track of all these articles, and the info for that will be at the end of this article.
One of the first things we need to understand with chassis setup is one of the most basic principles of physics: the Center of Mass. Everything that exists in the world has a Center of Mass, from a tall skyscraper to rain droplets. By definition, it is a single, intangible point in some object where mass is evenly distributed in every direction from that point. Most people know this point by a different name, the “Center of Gravity,” but calling it by that name in an Engineering or Physics sense will get you at least two sets of dagger-eyes from other people. I’ll go into why it is commonly called the Center of Gravity later.
The easiest (and probably one of the most well-known) demonstrations of Center of Mass is the “balancing bird” toy. It’s very simple, and can be found in almost every gift shop, but by simply placing your finger underneath the bird’s beak, the toy will balance perfectly on a single point, with the rest unsupported. This toy works as it does because the bird’s Center of Mass is directly above the point in the bird’s beak, allowing the bird to balance perfectly on your finger. The forward-swept wings place an equal amount of weight in front of the beak as well as behind, and since it’s symmetrical, it balances! Theoretically, you could do this with a race car, but I do not condone such actions, and if you drop a car on your head because you were trying to balance it on your finger, it’s your own fault.
Since the Center of Mass has an equal amount of mass in all directions, it’s simple enough (and a good learning tool) to find its location using the iRacing garage’s corner weights. For practice, we’ll use the corner weights from my 2012 Class B car at Indianapolis:
Left Front: 931 lbs
Right Front: 957 lbs
Left Rear: 962 lbs
Right Rear: 804 lbs
We’ll use the dimensions given in the car’s info page, which would have been the Nationwide Series 2011 Impala: a wheelbase of 110 inches and a width of 76.75 inches. First, we need the car’s weight by adding the four corners, which equals 3,654lbs. Then, we’ll find the left-side and front-end weight bias by adding the left-side weights and the front-end weights, respectively. The left side weighs 1,893lbs and the front end is 1,888lbs, and we need percentages, so divide both of those by the car’s weight (1888/3654 = Front %). The left side is 51.8% and the front-end is 51.7%, which checks out in the garage, so we did well. The crude and easy way to find the CoM location is to multiply that percentage by the dimensions, which would give us the opposite distance to the CoM location. Yes, that is confusing, so I’ll work through it. The front-to-rear location would be 51.7% (0.517) multiplied by the length (110″), giving us 56.87″. The CoM would be located 56.87″ forward of the rear of the car, or 53.13″ behind the front of the car. We’d do the same for the side-to-side, using the 76.75″ dimension, and get 39.756″ to the left of the car’s right-side door. So by doing just that, we’ve approximately located the car’s Center of Mass in the car as about 1.87″ ahead of the car’s center and 1.38″ to the left of centerline.
Vertical CoM location is nearly impossible through the sim. Finding it in the real world involved lifting one end of the car while it’s on a set of scales and measuring how much the weight on the other end increases, which can be plugged into an equation to find the height. For simracing purposes though, a 2-dimensional location is fine since we can only move it forward and rearward through ballast adjustments.
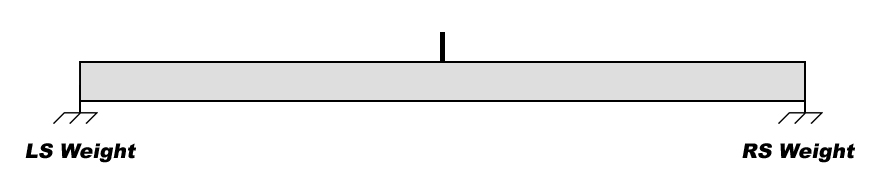
The “Beam-pogo” diagram is used heavily in vehicle dynamics to analyze what’s going on. In this diagram, we’re looking from the back of the car to the front, with the “car” being represented by the beam. If we were to use values for the Left- and Right-side weight, the CG would be located at the point where this beam would balance.

best racing games
I’m sure there are some asking why that was helpful at all, and it’s a very valid question to ask! The Center of Mass, in terms of the kind of analysis we’re doing now, is the acting point of all forces acting internally on the car. Lateral forces, acceleration forces, and yes, even gravity can be considered to be acting at this single point on the car. This idea that all forces act on a single point has led the Center of Mass to be commonly called “Center of Gravity”, or “CG”, because drawing out the forces acting on something will always result in Gravity being drawn at the Center of Mass. Both terms are equally safe to use, and both mean the same thing. The picture to the right shows that moving the car’s Center of Gravity still results in forces acting at the same point and the same angle, no matter where that point is located in the car.
The car’s CG location is important when trying to understand how the car is reacting to various adjustments and inputs when on track. As we saw earlier with my Indianapolis car, the CG was located slightly off-center and towards the left-front wheel. That was the older Class B Impala, and because the CG was located so close to the center, the forces generated from Indy’s low banking angles wouldn’t pull the left-side of the car down very easily. For that race, I ran a large rear spring split to make up for that, which would help the left-front to drop more easily when the car was loaded into the banking.
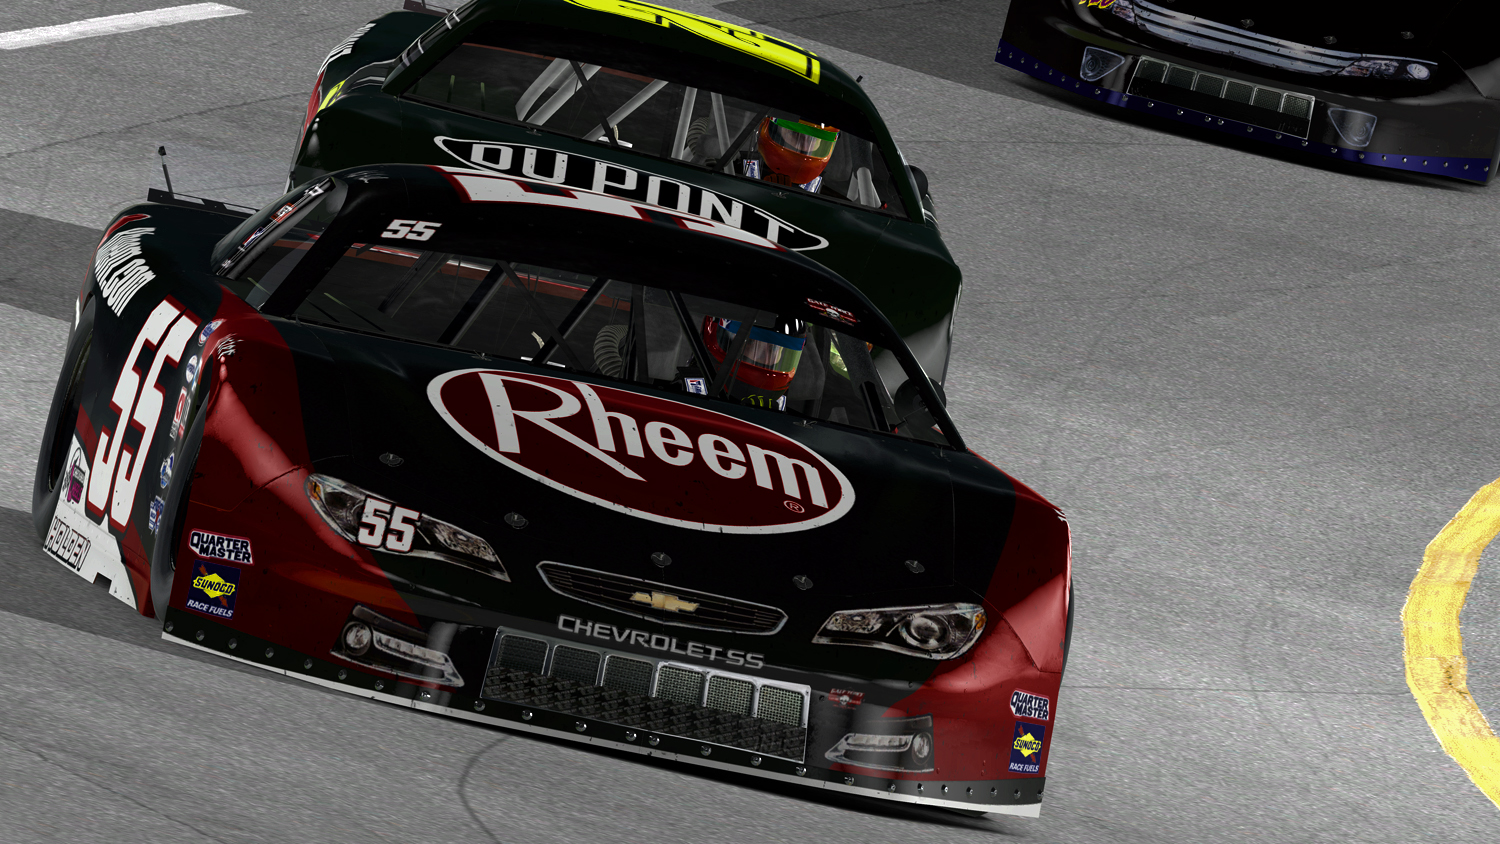
The Super Late Model’s offset chassis puts the CG farther to the left than in a NASCAR-style stock car
Conversely, if we compare the more offset chassis of the Super Late Model, the CG is much farther to the left. The higher left-side weight bias from the chassis offset means it will turn a whole lot easier to the left than my Class B car would, and banking should have a much more pronounced effect on the car’s tendency to roll to the left as banking increases. Because of that, we can run a narrower rear spring split if desired to help drive off the corner, since the banking is going to do most of the work for us.
Finally, we’re going to look at Inertia, defined in Isaac Newton’s first law of motion. Paraphrasing, the law says A body in motion will remain in motion unless acted upon by an external force. Earlier I said that all forces can be considered as acting upon the car’s Center of Gravity, and like normal G-forces, the same can be applied to the car’s inertia, or its tendency to continue moving in a straight line.
When we try to turn a car from traveling in a straight line, we begin fighting the car’s natural tendency to continue in that straight line. For a stock car, we’re fighting over 3,500lbs of stuff that does not want to do what we want it to do. Steering, aerodynamics, and track banking all introduce forces that help convince the car to move in a different direction, but at the basic level the car is completely happy going straight ahead. This law of inertia is the reason why we see cars continue in a perfectly straight line when something goes haywire. If a tire goes down or suspension pieces break, the car’s path becomes almost perfectly straight until it interacts with something else, usually a wall or another car, in a direct demonstration of Newton’s First Law.
The car’s front-to-back CG location has a huge role in how well a car will navigate the turns on a racetrack, and we have a direct control over where the CG is in this regard: Ballast. The Ballast adjustment is one of the simplest adjustments we have in the garage. I’ll go into more detail with it in a later article, but its purpose is directly related to what we’re discussing. In most cases, a race car will be built underneath the minimum weight required by a racing series’ rules. To reach the minimum weight, teams will add ballast to the car which can be moved around to various locations. Being able to move this weight around is important to making a car handle well, so a lot of effort is made into making the cars as light as possible so that more moveable weight can be installed on the car.
In a stock car, ballast is placed within the chassis frame rails at the bottom of the doors. A large square tube is used for the outermost section of the chassis’ center area, and teams will use either blocks of lead or tungsten (depending on what the series allows) as ballast. Moving the ballast forward or rearward in these rails will adjust the CG’s location, directly affecting how the car handles at high speeds. Moving the ballast forward in the car will shift the CG more forward, creating more understeer and a “tight” condition, while moving it rearward will do the opposite.

The red arrows are pointed to the blocks of lead ballast mounted to my kart’s seat. Initially, the blocks on the sides of the seat were mounted between my feet, which caused the kart to understeer tremendously due to a high front weight bias.
To finish this section, I’ll leave you with my personal experiences with ballast in a racing vehicle. Until a few years ago, I always assumed that – at a certain speed — the ballast began doing the opposite of what it would do at high speed. At 100mph, more front ballast would make the car tighter, and at 20 or 30mph, it would make it looser since there was more weight on the front tires, or so I thought. When I built my go-kart in 2014, I tried putting weight up in the front of the kart, even drilling holes to mount blocks between my feet to help the front tires dig into the pavement. During my first outing on-track, the kart wouldn’t turn at all, plowing straight through a very low-speed hairpin and proving to be extremely exciting on the high-speed sections of track. Keeping in mind that the hairpin was probably 15-20mph and the highest speed turn was around 50-60mph, that’s a big swing in speed.
I made two runs to make sure it was consistent, and then went back to my pit area to fix it. I removed the blocks from the pedal area at the front of the kart and mounted them to the side of the seat, right beside my hips. In total, I shifted about 20lbs about three feet back on the kart. The result was astounding: the kart suddenly became too loose in the high speed sections (about as exciting as the first runs) while being perfectly tame and predictable in the low-speed hairpin. I’ve since adjusted the ballast slightly forward from where it was but have not placed any more weight in the pedal area of the kart. This example was as eye-opened for me, since it took what I thought to be true and broke it completely. Today, I use the ballast adjustment constantly in the sim to fine-tune the car’s handling when we get to a new track, and it’s an invaluable adjustment. Many tend to overlook it, often saying things like, “You can’t be fast with a ballast adjustment other than zero,” which is untrue. Nick Ottinger has won NASCAR PEAK Antifreeze Series races with ballast set to 0″, some with it at 40″, and everywhere in between. We will go more in-depth with it in a future article, but don’t be afraid to shift the ballast around and see what happens!
~~~~~~~~~~~~~~~~~~~~
Thanks to some feedback, I’ve set up a Facebook page to access all of the Commodore’s Garage articles now and in the future! Head to https://www.facebook.com/CommodoresGarage and click the “Like” button to always be up-to-date with the series.

You may also like...


OFFICIAL PARTNERS:


")

Customize Cookie Settings
Performance Cookies
These cookies gather data on how visitors use this website – which pages are visited most often, for example.
Functional Cookies
These cookies remember website preferences and generally improve the performance of the site for the user.
Marketing Cookies
These cookies are used to provide a customized experience and can be used to provide targeted ads through advertising networks.

Enhance Your Experience with Cookies
We use cookies to improve your site experience. Customize your cookie preferences below.
Copyright © 2024 iRacing.com Motorsport Simulations, LLC. All Rights Reserved.