
Paint Textures
Custom Spec Maps
Our rendering engine now supports custom spec maps that can be used with custom paints. A spec map is a tga that tells the sim what properties the underlying materials on the custom paint tga are made of. By altering individual pixels in a specific way, you can tell the sim if the pixel is metallic or nonmetallic, if the pixel is smooth or rough, or if It should be lit by our lighting engine or not. This should allow you to create all kinds of materials, from matte to chrome and everything in between!
Our sim uses Physical Based Rendering (PBR). Physical Based Rendering uses shader and lighting models to accurately create materials that reflect their real world counterparts. Instead of using a spec, gloss, and environment map to create the spec maps for a material, you simply decide if the material is metallic, and then decide how smooth the surface of the material is. The shader does the rest. This greatly simplifies the process of creating spec maps.
To do all this PBR uses 2 textures to tell the sim how to display specularity:
Metallic: This greyscale texture tells the sim if the pixel is metallic or not, or something in-between. If the pixel is metallic, then you use white (255,255,255 rgb). If the pixel is non metallic you use black (0,0,0 rgb). Typically, this is a yes or no question, though there are edge cases with some kinds of materials where you may want some form of grey. The metallic channel is the red channel in our spec maps
The roughness channel tells the sim how rough the surface of the object is. white (255, 255, 255 rgb) is very rough, and therefore isn’t very reflective. Black (0,0,0) is totally smooth and therefore very reflective. This channel replaces the green channel in our spec maps
Combining these two textures together allows you create almost any form of material on a per pixel basis.
In addition, we use an alpha channel to determine what percentage of the metallic and roughness will show on a material. Essentially this is a mask to allow you to turn off environment effects on parts of an object that you don’t want them to show up on. It isn’t used very often, and is mainly there to allow us to mask reflections and spec lighting. An example of this is a hole in a body panel that isn’t cut out in geometry. You don’t want the sun to light this up, so you can put the hole into the alpha channel and the sim will ignore it when it comes to displaying lighting effects.
Creating a PBR Specmap
We have edited the Photoshop templates of our cars so that they contain the spec map we use in our sim for each car that supports custom spec maps. You can use this group as the basis to create your own spec maps.
A PBR spec map in our simulator is built a bit differently than our car paint scheme textures. Our PBR spec maps use 3 different greyscale maps, Metallic, Roughness, and an Alpha map used to mask out lighting effects To keep from having to have 3 different tga files to represent this, we instead use the RGBA channels in the TGA to house all 3 textures in one file.
Red channel: Metallic
Green Channel: Roughness
Blue Channel: Clear Coat
Alpha Channel: Specular Mask
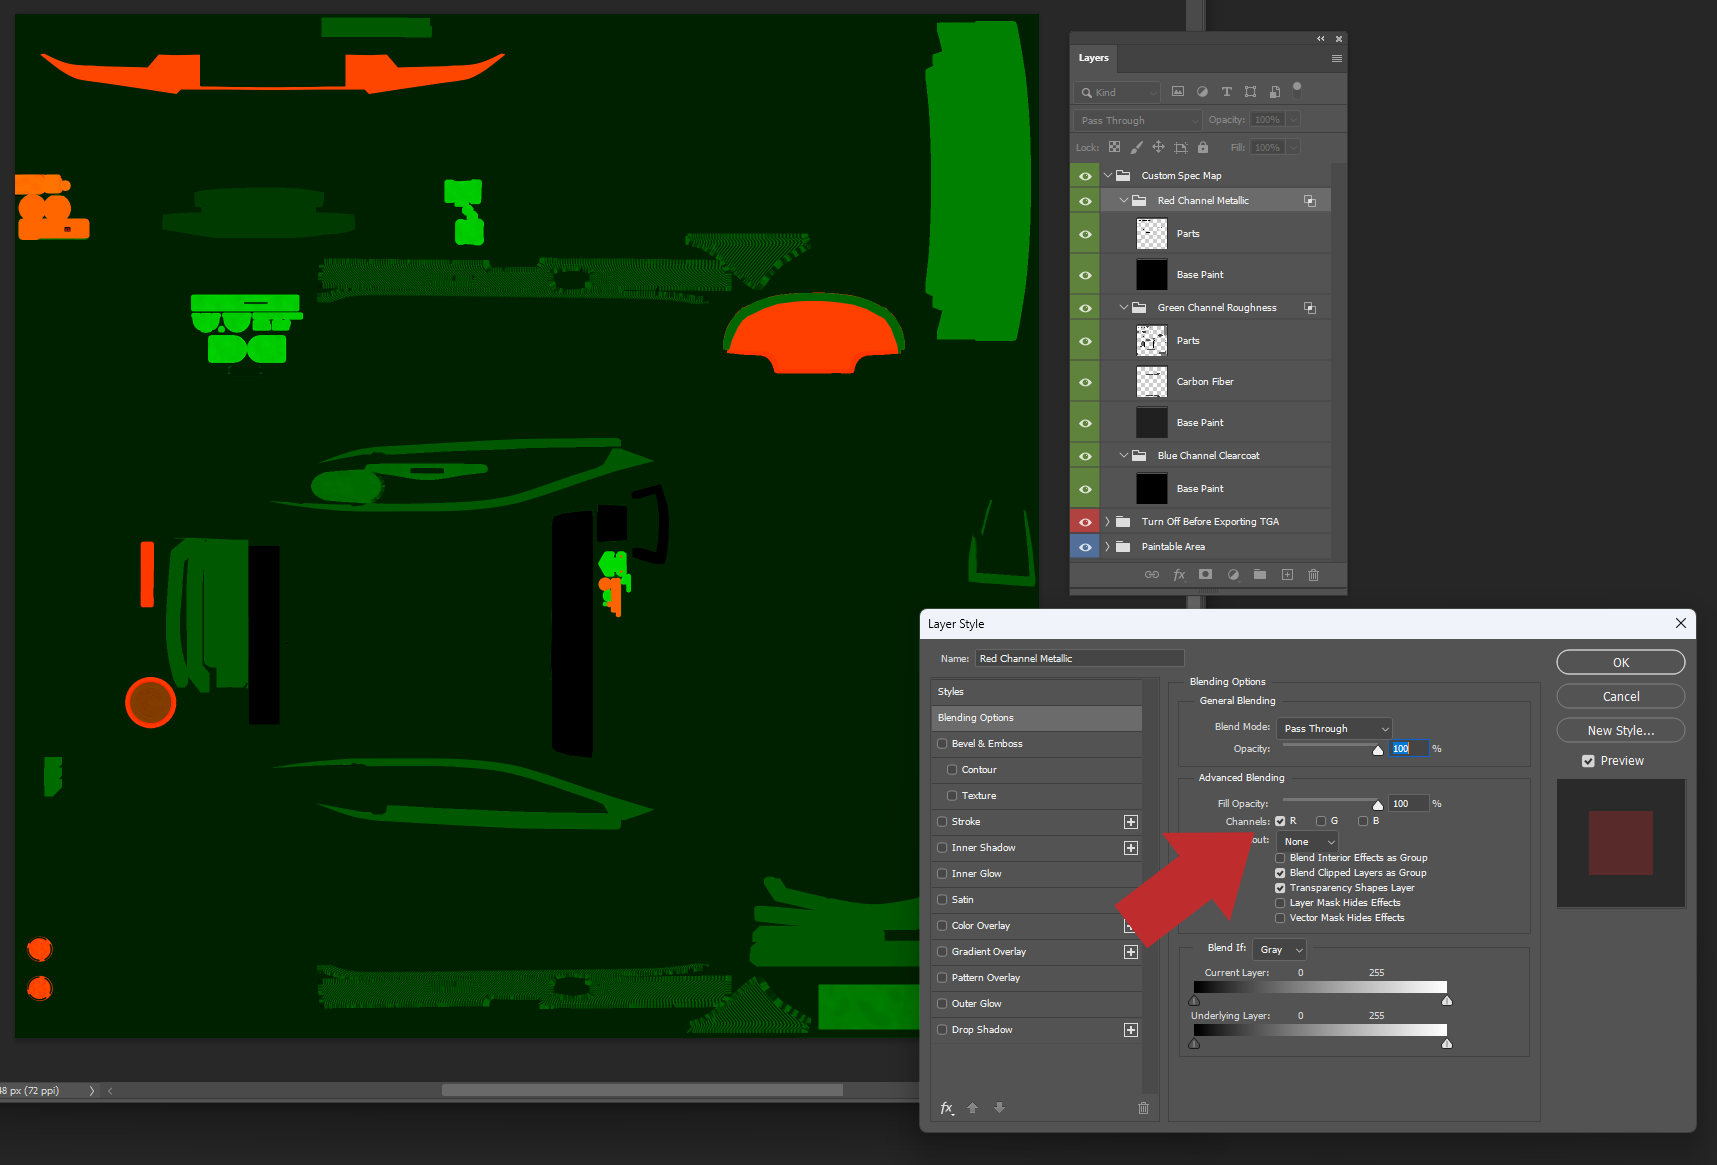
As noted above the process of assembling a PBR map is different from a normal tga. Pasting greyscale images into a channel can lead to weird noise and RGB value artifacts. The best way to combine the different channels together is to edit the layer group of the metallic and roughness layers in Photoshop and set the blending options to the specific channel they are going to go into. So for the Red channel metallic layer, I’ll disable the green and blue layers. For the Green channel roughness map, I’ll disable the red and blue layers. The blue channel is unedited and we leave it white typically. Doing this allows you to copy and paste the completed image into the diffuse of the spec map, or simply save the PSD file out as the spec map without having to individually paste the images into the respective color channel separately.. An example of how to do this shown below:
This process has already been done to the custom spec map group in each template. Just right click on the respective layer or layer group and go to blending options and you can see how we change each channel so that they combine into one image.
The alpha channel (if needed, not all cars have them) would be pasted into the alpha channel on the spec map as you would with any alpha channel.
This info graphic was created by game developer donotnod and is very helpful when trying to determine Metallic and Roughness values:
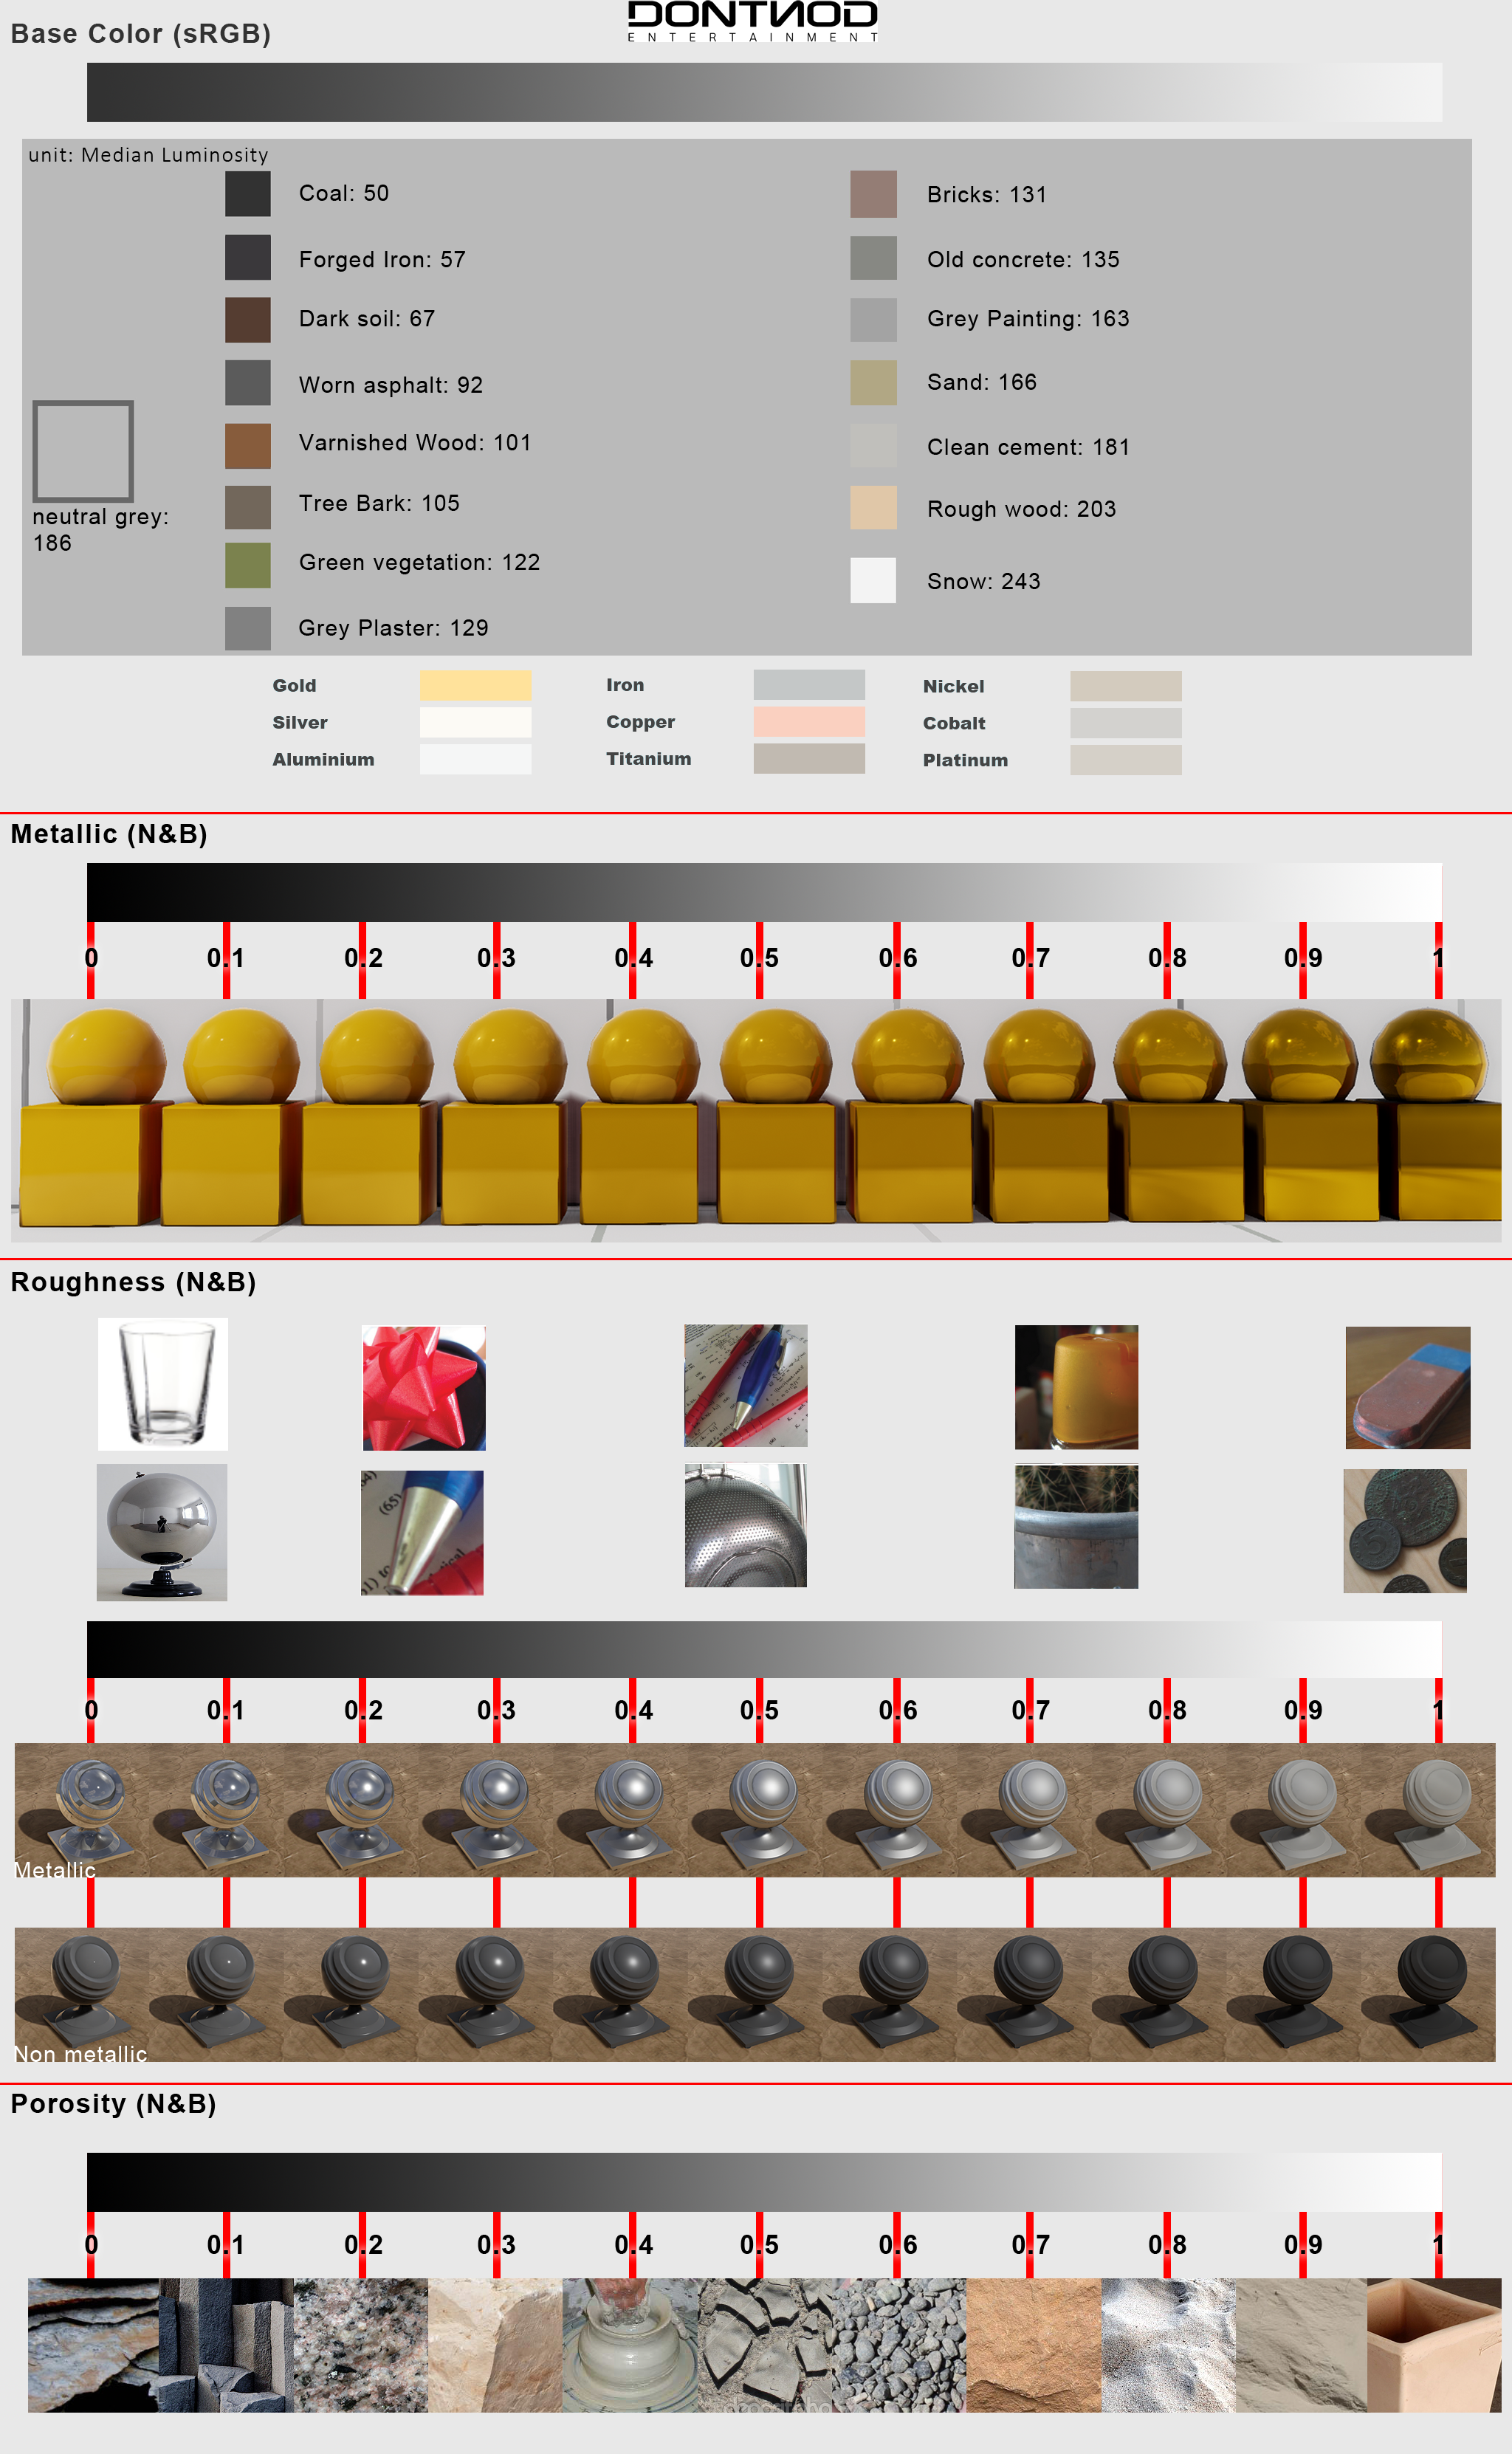
I’ve found the information in that graphic image matches what we get in our sim pretty well except we don’t use a porosity channel. To get your metallic and roughness values, you simply pick an example that is similar to what you are creating, and use the color picker tool to grab the grayscale color you want to use.
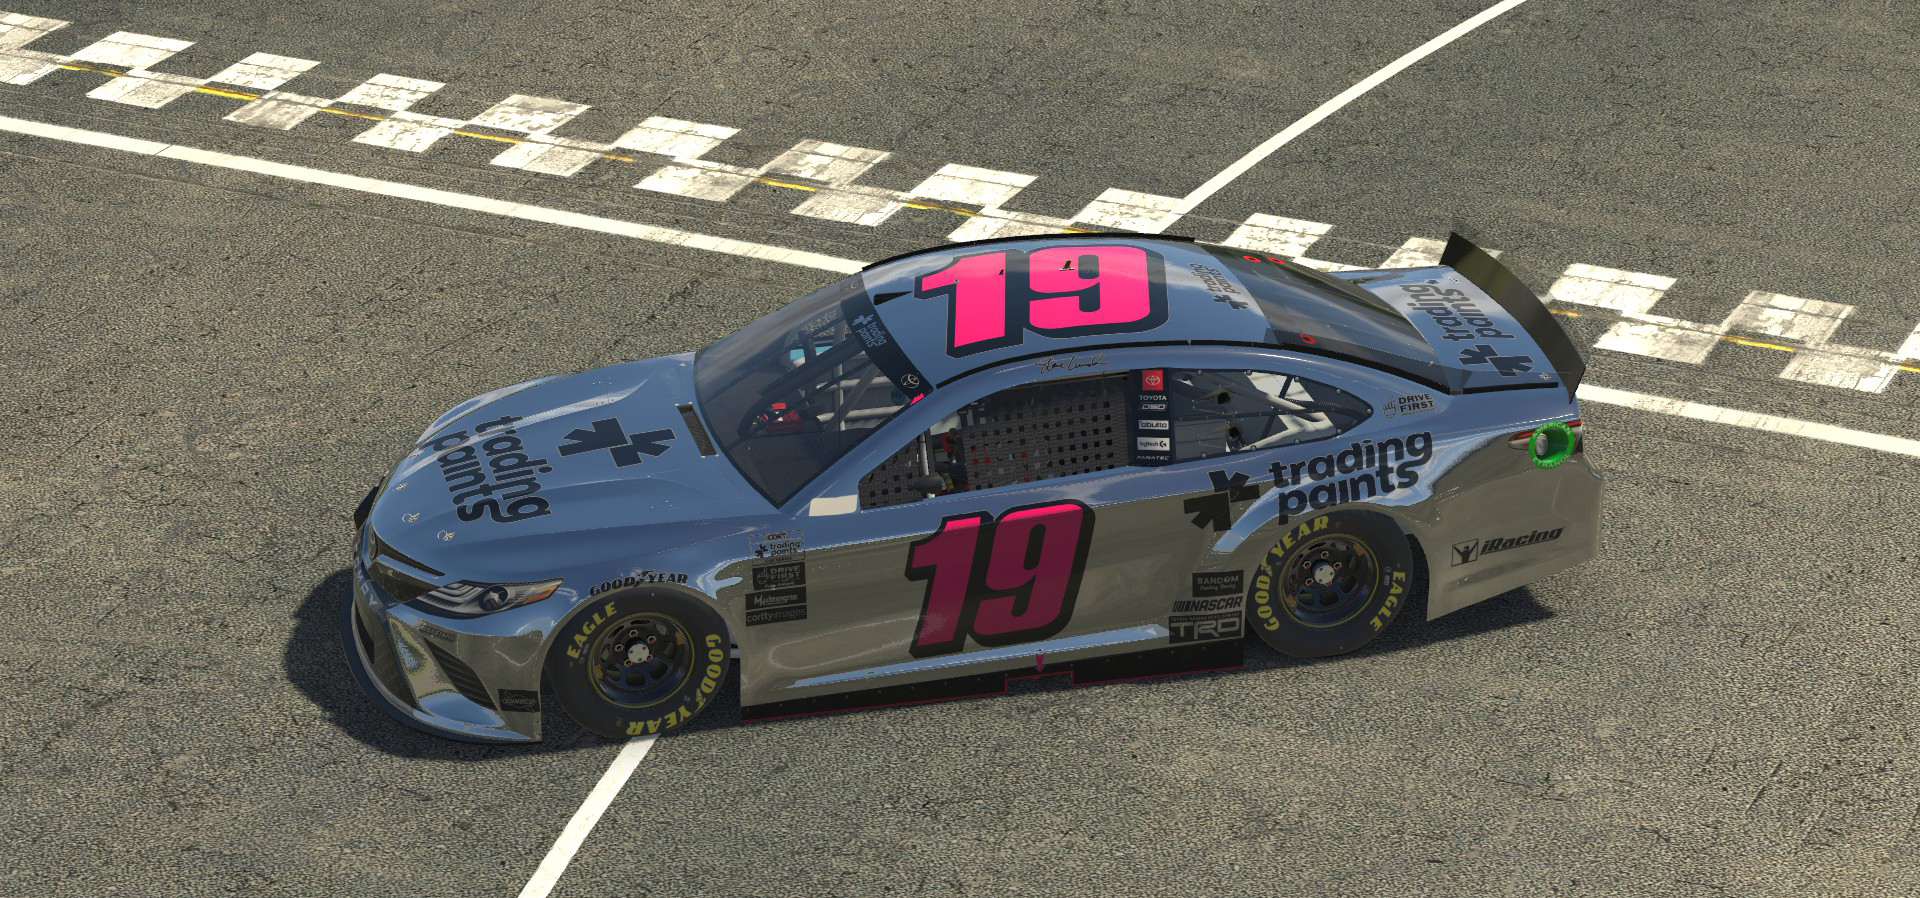
When painting a metallic car, please note that metallic albedo colors need to be MUCH lighter than normal. As an example, a pixel that is going to be chrome on your custom car should be white or very close to it. Your albedo color in your custom paint scheme will appear very dark if it’s turned metallic in the spec map, and you will need to compensate for this in your tga.
Also note that we don’t have a way to tell items stamped onto the car from the paint kit to be a particular material type. So car numbers, sponsors, etc. that are stamped onto the car will appear as whatever material type you have setup in the spec map that is in the UV space where the item is stamped.
Importing your Custom Spec Map into the Sim
To get your custom spec map into the sim, you will export the finished spec map as a 24 bit tga (32 bit tga if it has an alpha channel) named in the following format:
car_spec_“account number”.tgaSo if your account number is 12345, you would name the file:
car_spec_12345.tgaNote that these spec maps are in .mip format, not .tga format. The simulator has special support to enable the generation of a .mip from a .tga. For the player car only, the sim will first check for a .tga copy of the image, if the .tga is found, and is newer than the .mip or the .mip is missing, the sim will load the .tga and generate and save the .mip file from it in the same directory. In normal use however, the sim will always load mips, and it is intended that customers will trade these custom spec/shiny maps as .mip files in trading paints (rather than .tga format). Using .mip format allows them to load much more quickly.
OFFICIAL PARTNERS:


")

Customize Cookie Settings
Performance Cookies
These cookies gather data on how visitors use this website – which pages are visited most often, for example.
Functional Cookies
These cookies remember website preferences and generally improve the performance of the site for the user.
Marketing Cookies
These cookies are used to provide a customized experience and can be used to provide targeted ads through advertising networks.

Enhance Your Experience with Cookies
We use cookies to improve your site experience. Customize your cookie preferences below.
Copyright © 2025 iRacing.com Motorsport Simulations, LLC. All Rights Reserved.