IndyCar Reality Check: Barber Motorsports Park
March 25th, 2015 by Jared DePouw
Welcome to the first in a series of articles designed to provide insight into the iRacing Dallara DW12 IndyCar from those who know the car best: actual Verizon IndyCar Series drivers and race engineers. My name is Jared DePouw, and I joined iRacing in the summer of 2013 after attending the Indy 500 and wanting to race the same cars I saw in Indy. The idea to write these articles came to me after realizing that I’m not very good with the DW12 and also seeing the low participation rates for the DW12, especially on road courses (my favorite). The goals of my articles are twofold. 1. To help iRacers narrow down specific areas to focus on when building car setups, and 2. Advice from real life IndyCar drivers to help identify areas of tracks that they struggle with so that we know where to focus our practice. I hope you find them helpful . . . and enjoyable!
Barber Motorsports Park is one of those tracks that has it all: high speed corners, low speed corners, tight hairpins, elevation changes . . . and spiders. All of these factors combine to create a difficult track that feels like a rollercoaster. Now while we as iRacers won’t feel our stomachs moving from our guts to our throats, Barber is still a demanding track that will test every part of your sim driving skills.
Racing the Dallara DW12 is a two part battle. First you need to come up with a good setup. Chris Simmons, race engineer for Scott Dixon’s #9 Target Chip Ganassi Racing car, told me that there are two keys to building a quality setup for Barber: downforce and dampers. With an abundance of elevation changes and sweeping corners, it’s important to maximize your downforce in order to minimize braking distances and carry as much speed as possible through the various corners.
Even more important than downforce is the need to find the proper settings for your dampers. With such dramatic elevation changes, your DW12’s suspension will be shifting almost non-stop over the course of a lap, let alone a race distance. Therefore, it’s important to find the best combination of damper settings that will enable the car to absorb the correct amount of motion so that you don’t end up in the wall like the unfortunate Jack Hawksworth.
Building a proper setup for Barber is only half the battle since you still need to navigate the track. I was fortunate enough to talk with Dixon and Ryan Hunter-Reay about the track itself. Each identified sections of the track they believed were the most difficult sections and most important to get right every single lap.
Hunter-Reay started by comparing Barber to the Indianapolis Motor Speedway. “This track is like Indy, as soon as you think you got it somewhat figured out, it’ll come up and surprise you. And that’s what it’s like here; my best sections from the past two years are now my worst today. So you go back to the drawing board, look at it again, look at your driving, look at your setup. The most challenging I would think is the last section here coming into pit lane [Turns 14 and 15], before you make a right starting a new lap. And then Turns 2 and 3; just because they’re so long duration, you’re loaded up in the corner for so long, the car’s moving around the whole time, your head’s pressed up against the side and you’re pulling all those G’s. It’s a tough way to fight the car. So to make the car right there is very tricky.”
When asked the same question about his struggles at Barber, Dixon talked about the slow corners on-track being the most difficult. “I think the slow corners here are, for me, the most challenging and areas where you can gain the most time. So Turn 5, Turn 9, and even Turns 2 and 3. Those are always focuses for me.”
Now that we know what sections require extra focus, let’s explore them in detail.
Turns 2 and 3 combine to create a 180° downhill turn in three segments. 1 – uphill braking as you approach Turn 2; 2 -downhill idling for half of the turn; and 3 – accelerating through the rest of the downhill segment and Turn 3.
Turn 5 is another 180° turn, but a lot slower than 2 and 3. The biggest challenge of Turn 5 is that the braking zone leading up to the turn-in point is downhill.
Here it is important to find your brake marker and be very consistent with it. Accelerating out of the corner is uphill and you are in a low gear, so be careful to avoid too much throttle or else you’ll end up in the tire barrier ala Mr. Hawksworth.
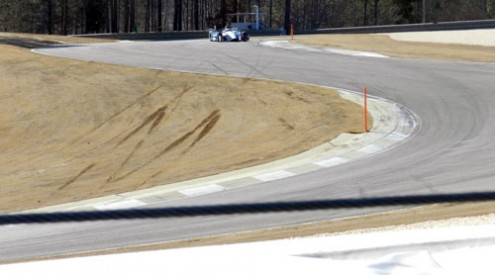
Turn 9 is located at the bottom of the hill next to the museum and is the final part of what I believe to be the hardest section of the track. This is because the Turn 7-8-9 sector is S-shaped, blind, and downhill. The key here is Turn 8. You will want to graze the curbing with your left side tires in order to allow you to make the right-hand turn around Turn 9 without losing a ton of speed. Sadly iRacers do not have the orange sticks used by the IndyCar drivers in order to gauge elevation, so mastering this sector will require nerves of steel and lots of practice.
Finally, Turns 14 and 15 are part of another 180° combination, except this time it’s an uphill section right before the entrance to pit lane. Navigating Turn 15 will require a good set up from Turn 14. After watching countless drivers navigate this section, I noticed that regardless of whether a car was entering pit lane or not, they all followed the same trajectory: You will want to apex at the outside of the track as if entering pit lane, then cut right through Turn 16 and downhill towards Turn 17 and the front stretch. Sadly taking a quality picture of the 14-15-16 complex was very difficult, so instead I leave you with this sign that hangs on the wall of the Race Control Building:


