

NASCAR iRacing Series Open Garage – Daytona 2015
February 18th, 2015 by Jaime Baker

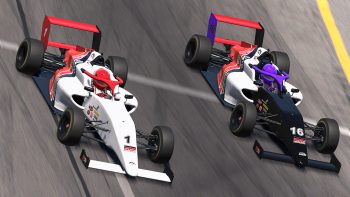
Ready or not, “Daytona is upon us.”
Daytona is upon us race fans, signaling the start of “Speed Week” and another season of the NASCAR iRacing Series “Open Garage.” Here in the Open Garage we hope to provide new and veteran drivers with an insight into the techniques we use to design and refine our setups for each track throughout the season.
For drivers joining us for the first time we welcome you, and hope you will find a few hints each week that will assist you in learning to create setups that will help you maintain stability while gaining confidence in the competitiveness of your car.
Each week we will explain a few of the steps we take to adjust the car to our liking. While the changes to the base setups and advice we offer may not win you races in the top splits, we hope that combined with “seat time” our advice will help newer drivers learn to analyze the way the car is behaving in an effort to make educated changes while tailoring the setups to their own driving style.
This week we are going to concentrate on adjusting the ride height of the car as well as combining the correct gear selection with grill tape. Our objective is to create a car that performs aerodynamically while retaining the power needed to be competitive without overheating the car when airflow over the radiator is reduced. This is particularly important when racing in a pack which is typical at superspeedways.
I strongly suggest testing for superspeedways with other drivers. You will find plenty of drivers practicing on the open servers throughout the week. You will want to try and find a server with a few drivers so that you have the chance evaluate how your car reacts in the draft. Specifically on tracks such as Daytona and Talladega where the airflow over the car combined with a reduction of airflow over the radiator will result in increased speed as well as higher oil/water temperatures than when running alone.
The first adjustment we are going to discuss is the “spring perch offset.” The spring perch is a fixed lower cup and an adjustable top cup which hold the springs in place. Spring perch offset refers to the change in the spring’s static length as a result of adjusting the upper perch. For example: If static length of a spring is 8.00 inches, and the perch is adjusted so that the spring is 7.00 inches, your offset is -1.00 inch. This is a negative value because by adjusting the top perch you have compressed the spring, removing some of its length. While also used to adjust weight transfer (which we will discuss later), the spring perch is most commonly used to adjust the “ride height” of a stock car.

“On most tracks you will want the ‘skirts’ of your car to sit as low as possible without scraping the track . . .”
On most tracks you will want the “skirts” of your car to sit as low as possible without scraping the track in the turns where the suspension comes under load or over bumps. Directing the airflow around the front valence and along the side skirts while reducing the amount of airflow under the car is known as “sealing the skirts.” A good way to evaluate this is to run a few laps after each adjustment then watch a replay of your car from different views, taking note of how low the car sits (especially in turns) and whether or not the car scrapes the track at any point.
The “gear ratio” refers to the ratio of the gears in the rear differential. The ratio is found by dividing the number of teeth in the “ring gear” by the number of teeth in the “pinion” gear. This adjustment directly affects the acceleration and top speed of the car. A lower ratio will generate a higher top speed, but will result in slower acceleration. A higher ratio will result in a lower top speed, but will have better acceleration. In addition running a ratio that is too high increases the rate at which RPMs will increase under acceleration which can result in higher temperatures which may result in engine damage/failure. Finding a balance between gear ratio in relation to the amount of grill tape used can help you keep your engine running at the optimal RPM range while maintaining proper operating temperatures.
We have just scratched the surface of the myriad adjustments available to the iRacing crew chief. Next week we will focus on basic chassis adjustments used to correct common handling issues. Each week we will explain a few adjustments that are relative to the track we will be racing.
Feel free to join us on our Forum thread where we will continue the discussion, answer questions and exchange setups. Have an outstanding season, Good Luck and God Speed.

You may also like...


OFFICIAL PARTNERS:


")