

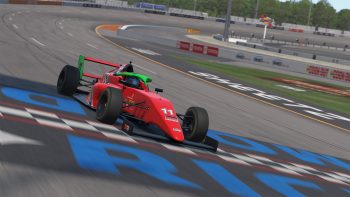
The Kitchen Sink: IndyCar Setup Introduction
March 15th, 2014 by Jaime Baker
Last night while running some go karts at On Track Karting with a friend who was back on spring break and my brother, I had a bit of a revelation. Even on these rental karts, which had no setup components or anything, there were things you as a driver could change to make it handle better. My friend did not really understand much of this at all, he doesn’t sim race, but he also isn’t a complete idiot when it comes to racing. We did two races back to back for a start. In the first one I went out without changing anything, but as I came into the pits to prepare for race two I had them move the seat forward. Why? To fix the balance of the car. After explaining all of this to my friend, we went into our final race and he tried them as best he could. Seat all the way forward, and leaning through the corners. For comparison, a super kart qualification time for our weight is a 38 second lap. Former iRacing Pro Series driver Frank Levick IV holds a super kart license. I myself was at a 38.6, just off of super kart. My friend, who has been there before, but has no real experience, managed a 39.7 in the end. This is only a second off of my pace, and much better than my other friends who had been there more times.
You may be wondering what this has to do with an iRacing.com IndyCar. Well, it’s what gave me the inspiration to start up on a series like this. Anyways, there are more to IndyCar setups than just a bunch of numbers. Even though, that is how it looked to me at first glance. There is always something you can change to make your car better. Not necessarily faster, but definitely more comfortable. In this series I will discuss different components on a Dallara IndyCar, and how you can use them and change them to make you a better driver on the Open Series. This will walk you through how my mind works when tweaking setups and from my experience, what has helped.
With the weather settings iRacing has been using lately, the Indy Car tends to be very different on either end of the track. Most people have base setups around, but what do you change when you aren’t able to go through Turn One at Indianapolis full throttle any longer. First, let us break down the various things I usually tweak on an IndyCar to get started, or to get a setup to feel the way I like. Normally, I go about tweaking sets by focusing on my qualifying set. We are going to work under the assumption that your setup is dealing with understeer primarily. With that settled, let us work our way from the front of the car to the rear. As it is a pretty base track — and we are racing there next week — let use Homestead.
Please note: I am no setup expert, nor do I know anything about real cars. These are things that I tweak and that for whatever reason have helped me. This is my attempt to break it down and explain it to you. Not all information may be 100% factual, if this is the case send me (Ray Kingsbury) a private message and we will fix it!
“There is always something you can change to make your car better. Not necessarily faster, but definitely more comfortable.”
GENERAL
Weight Jacker: This is an in car adjustment, set it to 0 before leaving the garage. WJ raises and lowers the right rear ride height (credit, Matt Cooke). For starts where wheel spin is an issue, I run 0 WJ. On the track, +20 will be the most loose, and -20 the tightest. Find what works for you, throughout the run. At most 1.5 mile tracks you will probably end up using closer to 20 from the start.
Gearing: You want to get the most out of your engine’s torque band in the corners and straights. The IndyCar’s highest torque is at high revs, which is why people spin out at high revs on the starts. The wind really can throw a wrench into these gears. Generally, you want to have a first gear that gets you off to a good start if you have throttle control. If you don’t put the longest one you can, and be safe, or start in second gear. Remember to setup your gears so that you can shift if you need to, and for race make sure that you put a gear that is long enough to accommodate for the lightened fuel load and draft at the end of a run, otherwise you will be pegging the rev limiter and will be the guy hanging out with the guys on the fixed set.
Tire Pressures: At most tracks these will be maxed out, but at some you will need to lower the right rear if your cross weight fails tech. Also, slight pressure adjustments can add more predictability and feel to your setups and avoid you from a snappy car. Generally, raising the right rear adds oversteer. Lowering the right front would have a similar effect. Pay attention to tire heat and wear patterns when adjusting this. Pay attention to the tire’s last known running temperature. You can see the balance of your car here. If you last hot pressure on the right rear is significantly higher, you may be suffering from slight over steer and not feel it until the tire is too overheated. Same goes for the front. This can help you in qualifying by allowing you to tailor the car a bit, and to avoid scrubbing off any speed by sliding.
Aerodynamics
Good read, but a little lengthy and I also try to cover it a bit below, with my experiences.
https://www.iracing.com/iracingnews/iracing-news/indycar-aero-primer
Front Aero: While considering front aero for Homestead, the choice for qualifying is easy. You want to run minimal front wing, minimal wicker height, and maximum wicker span. Here’s why. If you take a peak at that aero calculator at the bottom, you want to keep your front downforce percentage the same (do not change anything on the aero calculator). Take your wicker span and put it to 1/3, then raise your front wing angle until you have the percentage you had before (within .05% or so). Now, look at your downforce: drag ratio. You will notice you lost a bit of downforce, while maintaining the same balance. However, it’s not that you lost downforce. It is that you GAINED, drag. You want to optimize your downforce while keeping drag at a minimal. The larger the left side number on the aero calculator, the better is a general rule of thumb, though you don’t want to try a million aero combinations until you get this right.
Underside Aero: Not all air travels over the front spoiler, a lot of it gets under the car. Underside wickers, to me, are kind of like ground effects. I want to keep the balance of my car, but without any downforce in the middle of the car or at the bottom at highs speeds; I will likely suffer from sliding on all corners.
* I prefer to maximize horizontal wicker span.
* Side wicker height generally adds understeer, but if you strip it all off you will actually add even more understeer. Generally I like to keep side wicker height up, and decrease the rear wing angle to add understeer.
* Horizontal wicker height is tricky. It’s an adjustment that does effect drag and down force ratio, but you need to find a balance with it. I recommend adjusting this in 0.5 chunks until you find what you like and then figure out what direction to go from there.
Rear Aero: I generally run my rear aero very low on 1.5 mile tracks.
* I lay the wing angle as flat as possible to keep speeds up on the straights and to keep the car from getting tight in the corners.
* I also drop the wicker height as low as possible, because I don’t want my wickers sticking up in the air providing not only unneeded downforce, but lowering my DF:Drag ratio.
* For the ramps and extensions, at most tracks it’s down to experimentation. They have clear effects on handling and times. Even though you can take a lot of drag off my removing parts, the downforce they provide is still very important in the turns. Try them out for yourself and see what makes your set go faster.
Camber: Use this to fix your tire wear and heat issues. Use negative right side, and positive left side on an oval. Generally I aim for the two left most patches of each tire to be within 1-3 degrees of each other. You do not want the middle of your tire overheating, and here is why. If you right rear middle is hot, you will spin out. Your right front too hot, you will understeer. Also, if your inner most patches are too worn you will wear your tires down and lose some speed. Left sides are similar, but less important (but don’t ignore them!).
Credit: Tirerack.com
Caster: Caster changes the way in which your tires operate. Many people use it to replace excess camber to help with car handling and still keep the tires in decent shape. Generally the right front will run higher than the left front. Caster changes the axis along which the tire steers. Let us think about motorcycles for a second. A orange county chopper generally has a very laid back steering axis, the bars are long. This makes the bike stable in a straight line and at higher speeds. A motorcross bike however, has a very upright steering axis, which allows for it to be maneuverable. We have two front wheels, so it’s a bit different. Higher caster helps to exacerbate the effects of the steering wheel.
Credit: Tirerack.com
FRONT
Anti-Roll bar: The anti rollbar is an important part of the suspension of the Indycar. One important thing to know is that having NO anti-rollbar will infact loosen your car up, and as you increase it, it will get tighter. Simple enough right? Nope. You WANT to have a front sway bar on your car for qualifying at the least, because without it your car will lose speed, despite the improved handling. Normally you lose this speed from corner exit where your car carries its momentum to the left a bit, rather than straightening up nicely out of the corner. For qualifying, keep your ARB as high as possible to where you can drive the car comfortable. For race, the same applies, but if tire wear is an issue; consider dropping it for the long run.
Anti-Roll bar Arms: If an anti-roll bar is your shoe, then the ARB Arms are your shoelaces. The higher you go on the ARB arms, then the tighter the front of the car goes. The ARB arms are adjustable in car, but I would set them in the garage to a value that lets you pass tech inspection the most easily, so that you can adjust things on your car (such as cross weight) that are more favorable. Adjust these to your liking, they are more minute adjustments than an entire anti-roll bar change, but do have speed and handling effects that are similar.
*ARB Preload – the torque the suspension geometry has on the ARB. I don’t touch this unless for passing tech, or if I need to make a handling change. Think of it as potential energy in a way, it can add to handling issues depending on the polarity of the magnitude. I am usually near zero with this number.
Brake Bias: Run this near 50 to avoid locking up or sliding entering the pits on your green flag stops. This is personal preference, I usually run a bit above 50 to prevent the rear from stepping out.
Toe-in: This is another preference thing. At Homestead I want this number close to zero for straight line speed, but adjust it to my preference to avoid a sluggish turn in. Even at “0”, the toe is still minutely negative. Keep this in mind. I prefer a slight + front toe number as it allows me to get my apex right.
Think of it this way, negative front toe means the left tire is pointed left, and the right pointed right. I personally don’t want my highest load bearing tire pointing to the outside wall, this will give me more understeer than I already have.
Credit: Tirerack.com
Steering ratio: Having a higher steering ratio can help you prevent over-steering and can keep you more stable in the corners. (credit, Matt Cooke)
Ballast Forward: It’s rare that we go to a track where people aren’t using -20” ballast. This shifts the weight to the rear, and takes it off the fronts. This is like moving the seat on a rental kart, but in the opposite direction.
Bump/ Rebound: These are tricky. They affect how your suspension loads and unloads over bumps, into and out of the corner, and at the apex. Most IndyCar sets I see run these all at 0, all at 24, somewhere in the middle, or one of them maxed and the other minimized. In the end, they don’t have that much of an effect for a beginner driver. I would just use them to SLIGHTLY change the cross weight if you need to get your car legal. Also, feel free to tweak them for comfort. Generally the front bump will add understeer on entry and front rebound will tighten the car up off the corner.
Ride height, pull rods, and springs: This is pretty specific to the high speed tracks. Our target for this area of the suspension is to maximize rake while not having to lower the rear ride height to a point where it drags, fails tech, or makes the car uncontrollable. For those of you who do not know, rake is the difference between the front and rear ride heights. On the front of the car, we do this by raising the left front ride height as high as we possibly can. If you ever look at a dirt track car, you can see how high that left front gets to keep it turning through a corner, I’m guessing that is why IndyCar drivers tend to use such a high left front. Because in IndyCar we are fighting for .001 of a second to get us pole, things that seem unnatural like that can make that difference. So, aim for that left front to hit the high 1.9’s and get yellow.
* Front Springs – generally you are going to want to run these very low on a track like Homestead. As a general rule of thumb, lower front spring tension will prevent understeer on entry (into the middle of the corner!).
* Push rod lengths – Make your adjustments in a uniform manner if possible, remember to get that left front up. You can bring the right front up if you need to, but try to keep it lower than the front. My general rule of thumb is to take the average of the left front ride height and the rear ride height and make that my right front ride height when it is all said and done. Sometimes you may need your right front to be maxed out as well, depending on setup and track.
REAR
Anti-roll bars: I recommend running an anti-roll bar in the rear because your car will be quite tight without one. However, remember it is sometimes good to have one to keep the rear tied together as you come off of a corner. Unlike the front ARB, the rear ARB has opposite effect. Raising the rear ARB will make your car a bit freer, and lowering it will make it tigther.
Anti roll bar arms: These have the same effect in magnitude (but in the opposite direction) as the front ARB arms in relation to their portion of the car. Raising the rear one will make your car freer. Adjust as your run goes on, for starts, or for pitting if you need to.
* ARB Preload – aim for zero, but if you need to have a bit to change handling on certain parts of the track it doesn’t hurt too much. Usually mine is the opposite of what I have in the front in direction, but of a similar magnitude.
Rear toe: When adjusting rear toe, consider it sort of like steering. You are fixing your wheels at an angle at which it will affect how the car drives. Generally you want your rear tires to be pushing you down into the corner, unless you suffer from oversteer then you make want to try the other direction in an attempt to gain your speed on exit instead. But, because here we suffer from understeer, we will mostly use largely positive numbers on the right rear and largely negative on the left rear. The illustration below shows what I mean by “rear” steering. Basically, the rear tires are aiming for the apex before the fronts, offering less resistance to a momentum change.
Credit: Tirerack.com
Credit tirerack.com
Bump/ Rebound: Again, these are tricky. They affect your car on entry and exit mostly. A general rule of thumb is to lower your rear rebound if you are tight on corner entry and to lower rear compression dampers if you are loose off of the corner, which may happen if your tires aren’t balanced properly.
Ride height, pull rods, and springs: Again, track specific. But, for tracks of this type and speed where there are no real assymetricism between halves of the track or heavy throttle and brake alterations in corner, we want to run in the range of 1.4-1.7 for our rear ride height. Usually towards the lower end on the higher banked tracks.
* Spring tension – generally your right rear will be very high since we will suffer from some understeer, because this in itself cannot fix the problem we will lower the left rear as well. This means our rear ride heights are going to be bonkers, if we expected a perfect picture.
* Pull rods – I tend to notice the numerical value on the left rear is greater than my right rear. Cross matching the right front in some cases. Meanwhile the left front and right rear cross match. Almost every setup I have for any track that isn’t a short track has values between 21.00 – 23.1. I would consider this my range.
Recommendations
* When converting a Q set to a race set, remember to add your fuel load. Then, try to get your rear ride height to match the ride height of the Q set. Remember, the right height will rise as the run goes on, but you do not want to lose a ton of time at the start of the stint from the rear being wrong.
* If your car is very tight in race trim, try taking that front roll bar off. You will lose a bit of speed, but could find it with the improved stability and better balance over the long run of a stint.
* Don’t be afraid of putting on too much downforce. If you need to add a little downforce it could be beneficial. It will allow you to pass more easily in the draft in race. But also, it will help you onto pit road and make your car more stable and possibly wear tires less. It’s all personal preference, but don’t run too much that it’s like having a parachute on the car.
* Remember to get on some sessions and ask for help, watch the line of other drivers or there is no sense in building a set. Everything I said here is how I interpret it, and how it works. So, if anything is wrong send me a PM on the iRacing forum and I will fix it in the future.

You may also like...


OFFICIAL PARTNERS:


")